[vc_row][vc_column][vc_column_text]
CumulusCI helps development teams build great applications on the Salesforce platform by automating org setup, testing, and deployment.

CumulusCI Setup
Set Up Your Salesforce Environment
Enable Dev Hub
Follow these steps to enable Dev Hub. (We have created a Trailhead Playground for this demonstration purpose.)
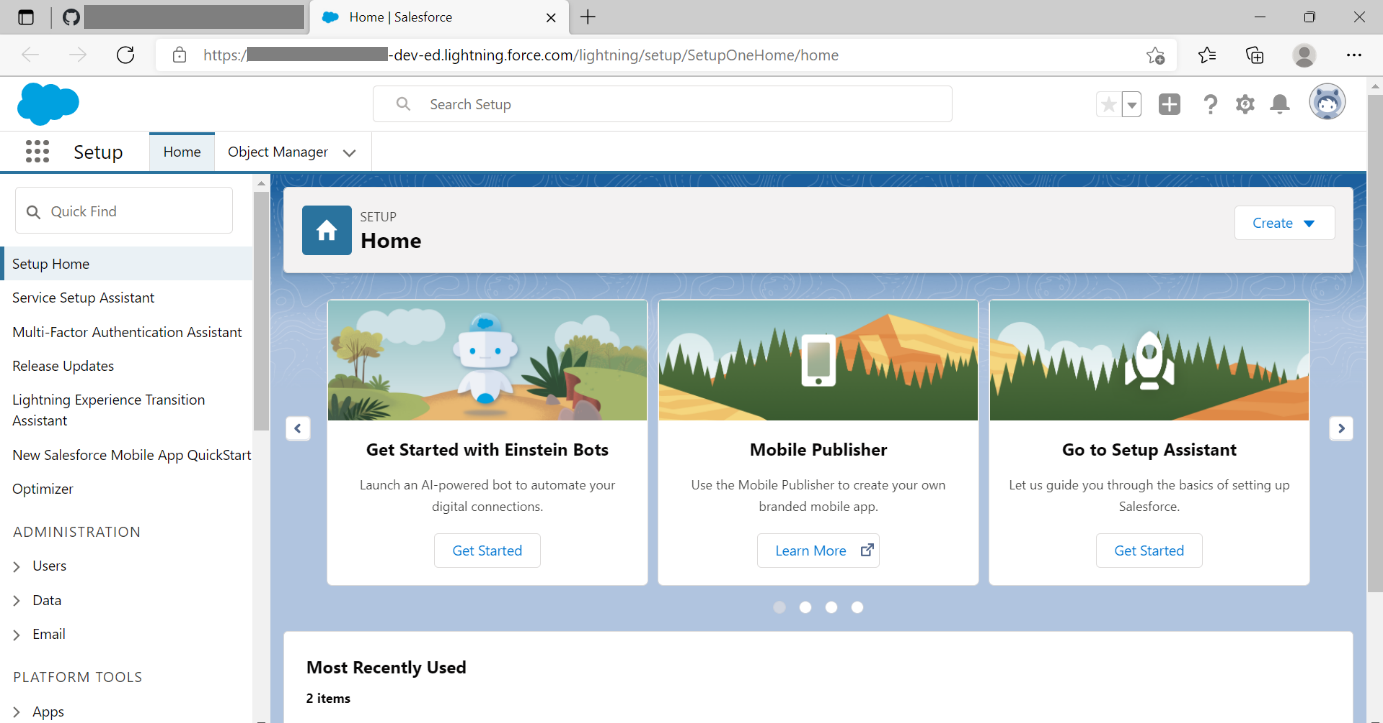
- From Setup, enter Dev Hub in the Quick Find box and select Dev Hub.
- To enable Dev Hub, click Enable. Don’t change any of the other options.

Install the Salesforce Command Line Interface
Follow these steps to install the interface.
- Navigate to the Salesforce CLI home and download the Salesforce CLI version for your operating system. Open the downloaded installation file and step through the installation with the default settings selected.
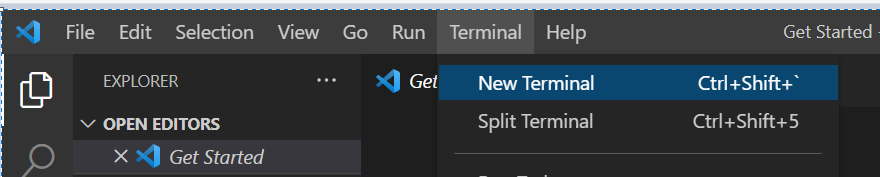
- To confirm that Salesforce CLI is installed, open VS Code and choose Terminal→New Terminal. It will look something like this:

- In the command prompt, enter: sfdx version

Authorize SFDX to Connect to Dev Hub
Follow these steps to authorize Salesforce CLI access to a DevHub-enabled org. The authorization allows SFDX to securely store a token (a secure version of your username/password) along with the alias for the Salesforce org.
- Open VS Code and go to the Terminal in the Panel.
- Type this web login flow command to log in and set an alias name for the org, such as CCIDevHub: sfdx force:auth:web:login -a CCIDevHub
- This will open a browser to the Salesforce login page. Log in using the username and password for the org in which you enabled Dev Hub.
- When prompted to “Allow Access” for Salesforce CLI, click the Allow button.
- Back in VS Code, verify you can now log into the org by typing this command: sfdx force:org:open -u CCIDevHub
Install CumulusCI (Windows Users)
Install Python 3
- Go to the Python 3.9 downloads page.
- In the Files section, select a suitable installer for your computer. If you don’t know which release is suitable, choose “Windows x86-64 executable installer”.
- After the installer is downloaded, open the installation wizard.
- You must add Python to PATH. The checkbox for this will read something like “Add Python [version number] to PATH”.
- Use the Install Now option; you do not need to customize the installation.
Install pipx
- Open VS Code and go to the Terminal in the Panel. If you already have VS Code open, close it and reopen it.
- Enter this command: python -m pip install –user pipx
Some warnings about PATH during the installation of pipx are normal. We’ll address the causes of those warnings in a moment.
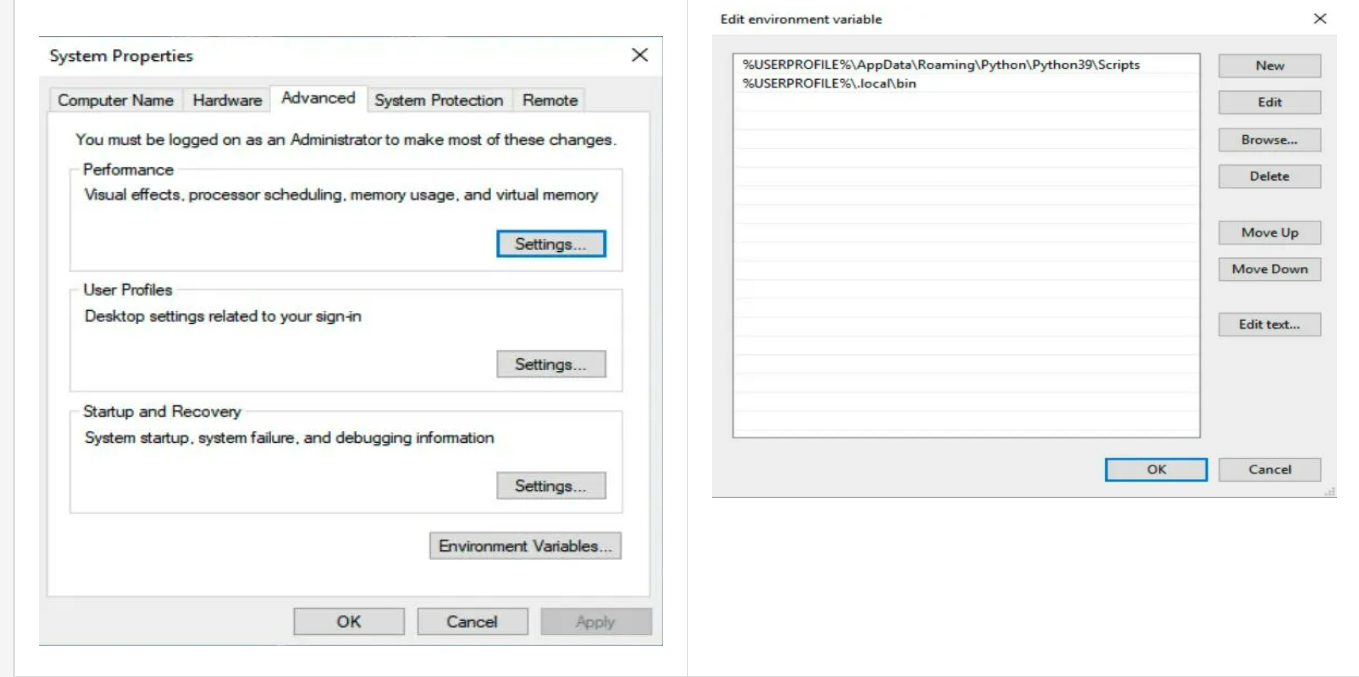
Modify PATH in Environment Variables
To ensure that all of your Terminal environments know where to find Python and the Python scripts that you install (including CumulusCI), edit your computer’s environment variables. Editing these settings requires non-restricted access to your machine (administrator rights).
- Search your computer for “edit environment variables”. It’s typically in Advanced System Settings in Control Panel.
- Click Environment Variables.
- Select the PATH user environment variable and click Edit.
- Click New and add these values:
- %USERPROFILE%\AppData\Roaming\Python\Python39\Scripts
- %USERPROFILE%\.local\bin
Verify pipx is Installed
- Close VS Code and reopen it.
- Open a new Terminal (Terminal→New Terminal).
- Enter the following command to verify that pipx is available: pipx –version
You should see a version number such as: 0.12.3.1. If you get an error instead, such as ‘pipx’ is not recognized as an internal or external command, operable program or batch file, check that your environment variables have been updated and that you’ve opened a new terminal.
Install CumulusCI
Still in the VS Code Terminal, enter this command: pipx install cumulusci
The CumulusCI installation will begin and might take a few moments. You’ll see a confirmation message when the installation is complete.
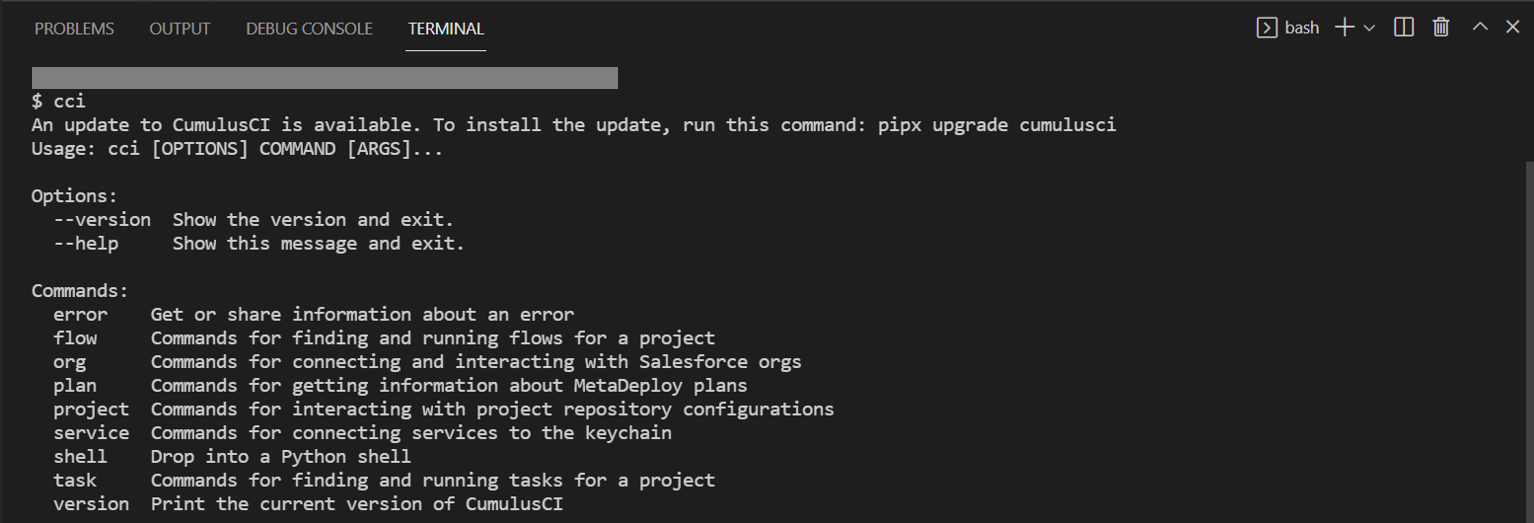
Verify CumulusCI Installation (Windows)
Make sure the CumulusCI command is available by entering this command: cci
GitHub Setup
Connect CumulusCI To Your GitHub Account
CumulusCI needs your GitHub account credentials to access automation in GitHub.
- To store the credentials in CumulusCI’s keychain as a service, type this command in the VS Code Terminal: cci service connect github github.com
- When prompted, enter your GitHub username.
- Paste the personal access token generated above as your password.
- Enter the email address used for your GitHub account.
- CumulusCI will check the credentials you entered to make sure they work. If everything is working, you’ll see: GitHub is now configured for all CumulusCI projects.
Install GitHub Desktop
- Go to the GitHub Desktop website.
- Download the appropriate Mac or Windows version.
- Install the application.
- Open GitHub Desktop app.
- Sign into your GitHub.com account.
- Complete any additional setup steps requested by GitHub Desktop.
- Click Finish.
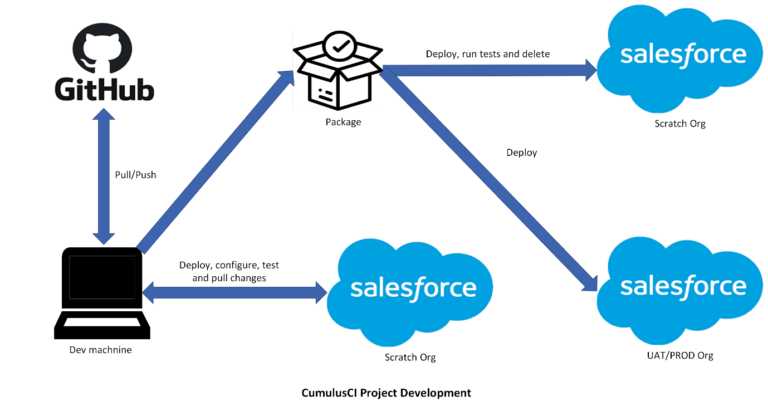
Project Development with CumulusCI
Set Up the Project
Create a GitHub Repository
GitHub provides a shared space for everyone collaborating on the project. It provides a Version Control System (VCS) that helps keep track of changes to the project, and it’s where changes and customizations will be stored.
To create a GitHub repository:
- Open GitHub Desktop.
- Select File→New Repository from the menu.
- Enter the information for the repository below:
- Name: CumulusCI-Demo
- Description: Automation using CumulusCI
- Local Path: Choose your GitHub folder, or if you prefer, create a new one to store your project.
- Git Ignore: None
- Licence: None
- Click Create Repository.
Now your repository is set up and you’re ready to begin configuring automation with CumulusCI.
Configure Project to Use with CumulusCI
You need to configure the project to use CumulusCI on your computer. CumulusCI provides customizable automation for everyone on the team to create development or test environments in scratch orgs and automate setup steps for the project.
Follow these steps to configure your new project to use CumulusCI:
- In GitHub Desktop, open your repository in VS Code by choosing Repository→Open in Visual Studio Code.
- In VS Code, open a new Terminal by choosing Terminal→New Terminal.
- In the Terminal window, type the command: cci project init
- Answer the series of prompts for information about your project:
- Project Name: CumulusCI-Demo (Give the name of your project.)
- Package Name: CumulusCI-Demo (Give the name of your package.)
- Managed package project: n
- Salesforce API Version: press Return to accept the default
- Source format: sfdx
- We’re not extending another project: n
- Press Return to accept the defaults for all remaining questions.
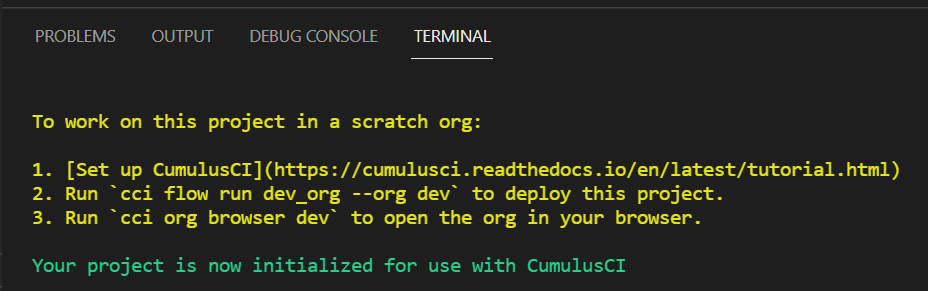
When you complete these steps, VS Code Terminal should say: Your project is now initialized for use with CumulusCI
- In the VS Code Terminal, type the command: cci service connect devhub –project
- When it prompts you to enter Username:, type CCIDevHub and press Return.
This configures CumulusCI to use the special Dev Hub org that you created for this trail when you ask it to create scratch orgs for this project.
Commit Config to GitHub
You’ve set up CumulusCI to work for the project on your computer. Now, share this with your team by committing the configuration to the central GitHub repository.
Start by getting the configuration ready to head to GitHub by committing the configuration to the main branch of your project:
- Open GitHub Desktop and make sure that your CumulusCI-Demo repository is selected under Current Repository.
- You should see a list of changed files on the left-hand side of your screen. All of the files should be selected.
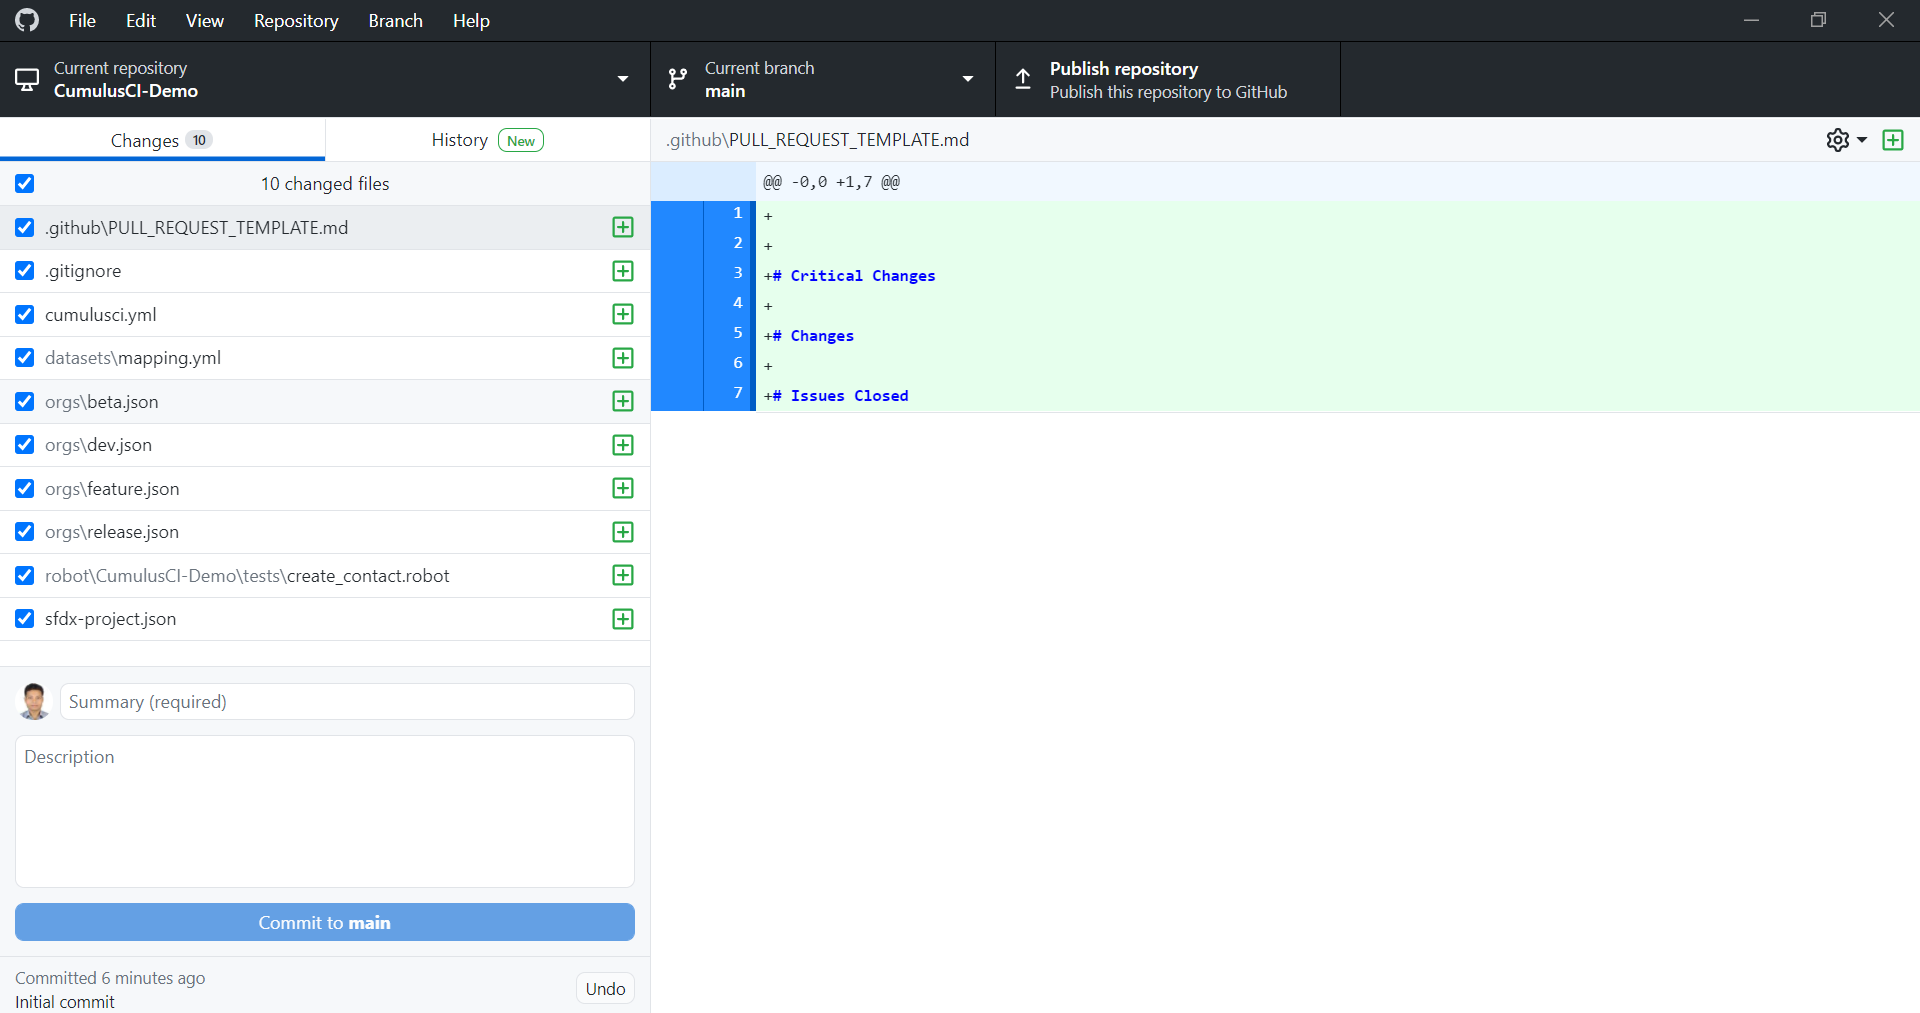
- In the bottom left Summary field, enter a brief summary of your changes, such as Set up project.
- Click Commit to main.
Next, publish the work to GitHub and allow team members to collaborate with you:
- On the right-hand side of your screen, locate the section Publish this repository to GitHub and click Publish repository. Because this is a test project, you may want to select Keep this code private, which means that other GitHub users won’t see your work.
- Click Publish Repository.
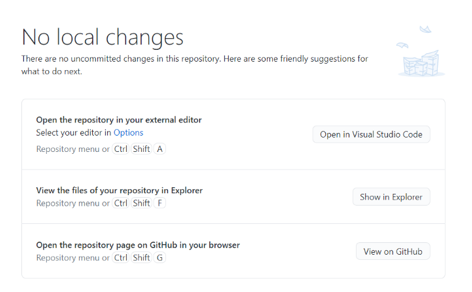
- Once the process completes, click View on GitHub in the right-hand pane to open your GitHub repository in a web browser, so you can work with it there in the next section.
Make and Capture Customizations to Your App
Create Object & Field (Do The Customization Per Your Requirement)
You need a temporary scratch org so you can configure it to handle the requirement. Now, create a scratch org to act as your development environment while you build your changes.
- In the GitHub Desktop menubar, select Repository→Open in Visual Studio Code to open your repository in VS Code Terminal.
- Run the following command in the Terminal: cci flow run dev_org –org dev


The automation will take a few minutes to run. While that automation is running, let’s look at what you instructed CumulusCI to do. The first part of your command, cci flow run, kicked off a CumulusCI flow, which is just a series of tasks. The flow you told it to run is dev_org. This flow creates and configures a scratch org, and you’ll use this new scratch org to develop your customizations. The dev_org flow automates:
- Creating a scratch org
- Installing dependencies, such as other managed packages that our app builds upon
- Deploying our application
- Running any post-install configuration we’ve defined.
The last part of the command, –org dev, tells CumulusCI in which scratch org to run the flow. In this case, the scratch org is called dev.
Capture Changes Locally on Your Computer
Time to start implementing! In the scratch org you just created and configured with CumulusCI, create objects and fields as per the requirement.
- If you don’t already have VS Code open, open your repository in the VS Code Terminal by choosing Repository→Open in Visual Studio Code in GitHub Desktop.
- Open the scratch org named dev in a new browser window by running the following command: cci org browser dev

- Now that the scratch org is open in your browser window, build the customizations you outlined in your requirement:
For this demonstration purpose, I have created a custom object ‘Test’ and a custom filed ‘Test’.
With customizations created in the dev scratch org, it’s time to capture the changes to the GitHub repository on your computer.
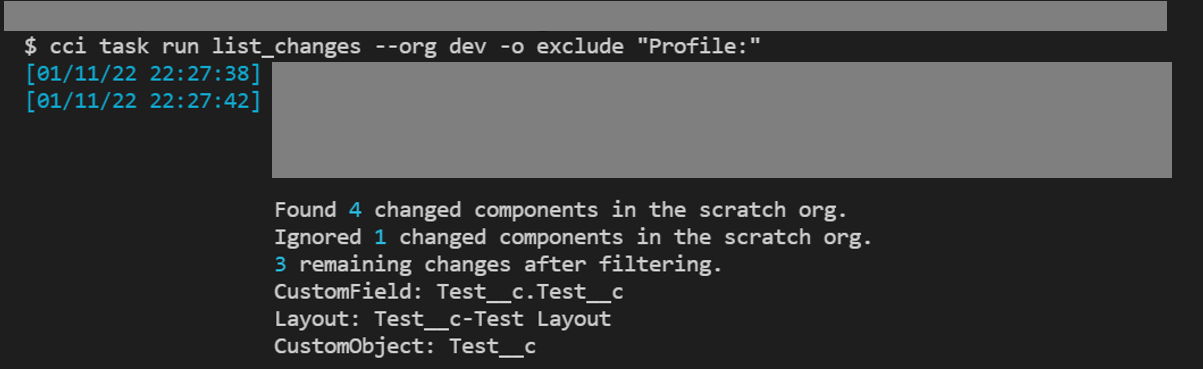
To show a list of all the changes detected in your dev scratch org, type the following command in the VS Code Terminal: cci task run list_changes –org dev

You’ll notice the list includes your schema changes—the objects and fields you just created—as well as some others: page layouts and profiles that were automatically updated as you made your changes.
Sample output from the list_changes task, showing components that were changed
It’s best to leave profiles out of a managed package. Modify the command to exclude profiles: cci task run list_changes –org dev -o exclude “Profile:”
With the list of changes looking good, you’re ready to capture your changes. Use a command similar to the list one you used a moment ago to retrieve all changes and exclude those profile changes.
Enter this command to retrieve: cci task run retrieve_changes –org dev -o exclude “Profile:”
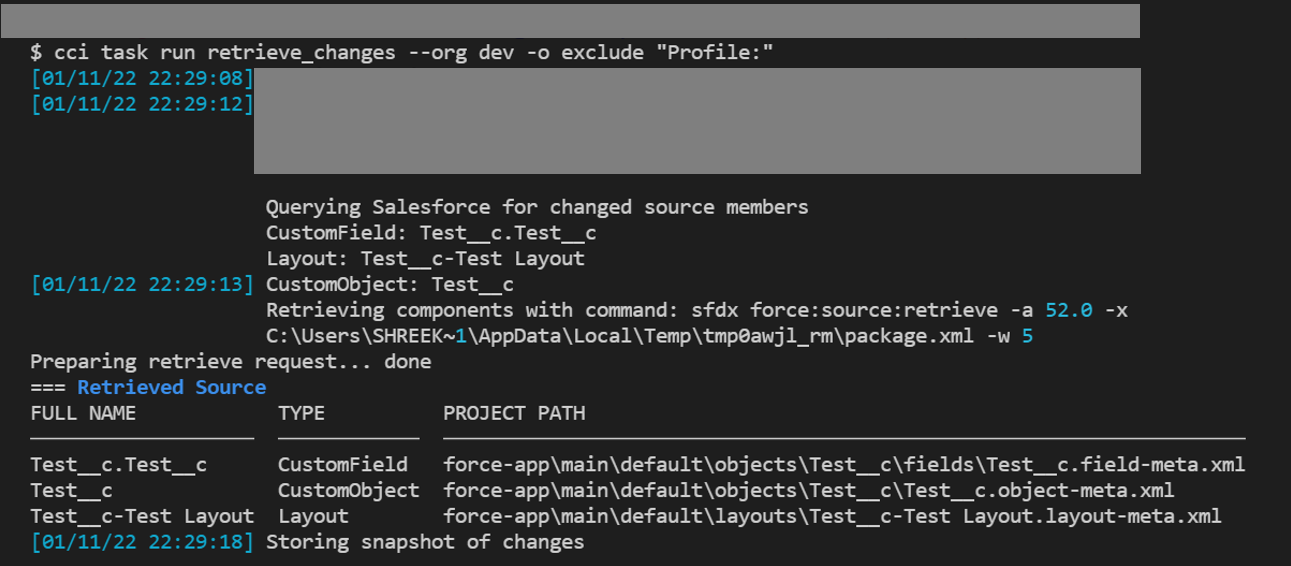
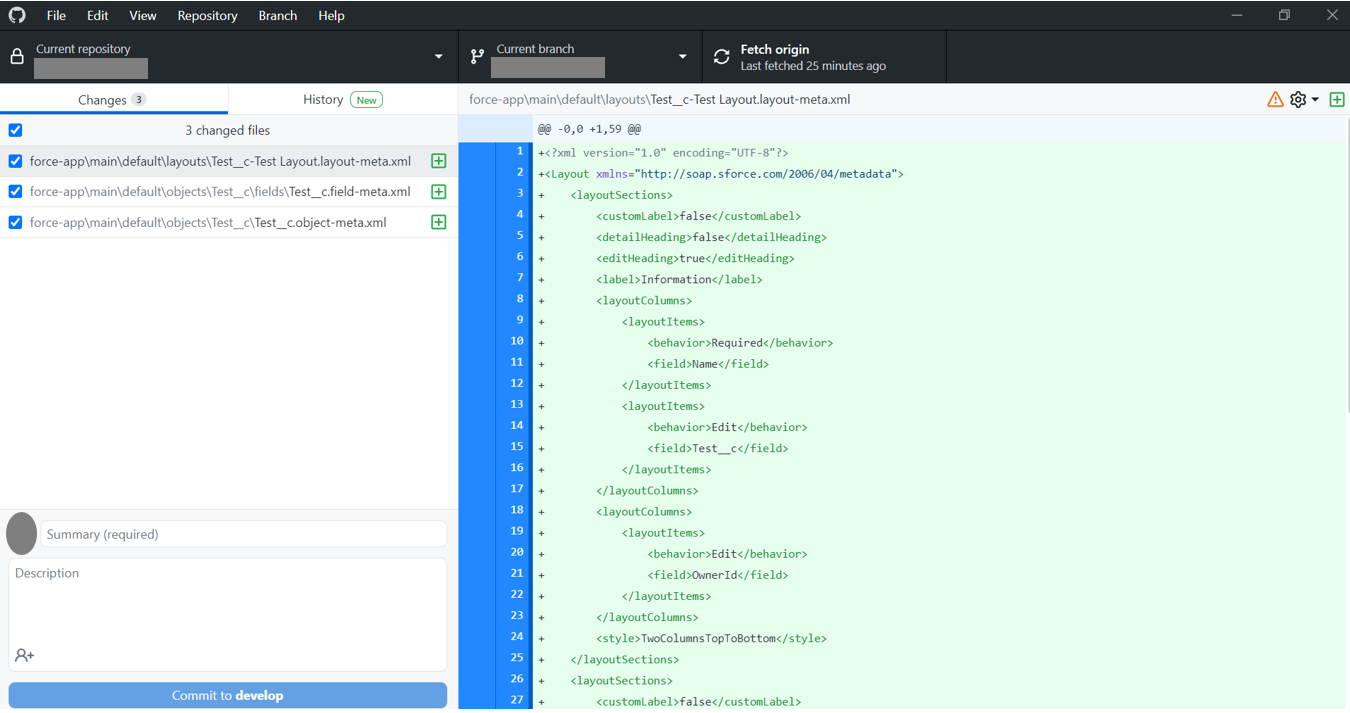
Your changes should now appear in GitHub Desktop. GitHub Desktop tracks changes to files in your repository automatically and shows them to you so you can store them in version control and share them with teammates.
Make Customizations Available to Your Project Team
Create a Feature Branch on GitHub
Branches are used to isolate your development work, or “features,” from other team members’ changes. Create a feature branch and add your changes to it:
- Open your repository in GitHub Desktop. You should see your changes from the last module, which you pulled from the dev scratch org.
- Select the tab named Current Branch: main.
- Click New Branch, to create a new branch off of main.
- Enter feature/tests for the branch name and click Create Branch.
- Select Bring my changes to feature/tests. This tells GitHub Desktop that you want the changes you’ve already made to start out your new branch.
- Click Switch Branch.
Now on the feature branch, it’s time to create a commit to preserve these changes. A commit is a defined point in the history of your project: with a commit, you add the changes you’ve made to version control.
- Enter a Summary and Description indicating what you’ve changed: Created Test object and Test field
- Click Commit to feature/tests.
Push Changes to GitHub
Currently your new branch with your customizations are stored on your computer. Share this with team members by pushing the changes to GitHub, where you can request for another person to review your proposed changes by creating a Pull Request. Pull requests provide a way for teams to track, review, and combine team members’ work.
- Publish your changes in GitHub. In GitHub Desktop, make sure you have your feature/tests branch selected, and click Publish Branch.
- Create a pull request; select Branch > Create Pull Request. GitHub opens in a browser window.
- The pull request’s body is populated with several headers. CumulusCI handles generating cumulative release notes for your project’s releases using content entered in the body of pull requests. Edit the following sections:
- In Changes, enter a description of what you did, such as, – Created Test object and Test field for demo purpose.
- In Issues Closed, enter – Fixes #1. (Enter ticket number of your task in GitHub)
- When you’re finished adding details about the changes you want to make, click Create pull request.
[/vc_column_text][/vc_column][/vc_row]